


Requirements
Hardware Requirement:
To develop a React Native app, you will need the following hardware:
A computer running Windows, macOS or Linux
A mobile device (iOS or Android) if you want to perform testing and debugging on your app
A USB cable to connect your mobile device to your computer
Software to be installed:
To develop a React Native app, you will need the following software:
Node.js and npm (Node Package Manager) installed on your computer
A code editor or integrated development environment (IDE) of your choice
Xcode or Android Studio, depending on whether you are developing for iOS or Android.
Installation of Softwares
Step 1: Download VS Code
Install any code editor of your choice. I would recommend downloading VS Code.
- Go to the Visual Studio Code website (code.visualstudio.com) and click on the "Download" button for your operating system (Windows, MacOS, or Linux)
Step 2: Install chocolatey
Chocolatey is a package manager for Windows
Open Windows Powershell by right-clicking on the (Windows Powershell) icon and selecting "Run as administrator"
Now run the following command
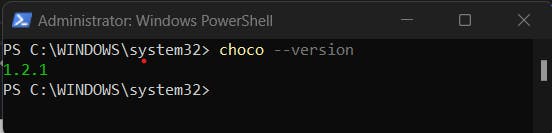
C:\WINDOWS\system32> Set-ExecutionPolicy Bypass -Scope Process -Force; [System.Net.ServicePointManager]::SecurityProtocol = [System.Net.ServicePointManager]::SecurityProtocol -bor 3072; iex ((New-Object System.Net.WebClient).DownloadString('https://community.chocolatey.org/install.ps1'))After successfully running the command, check if chocolatey is installed using the below command. It should show the version of chocolatey if it is installed.
PS C:\WINDOWS\system32> choco --version
In case of any error relating to ExecutionPolicy go through the below steps:
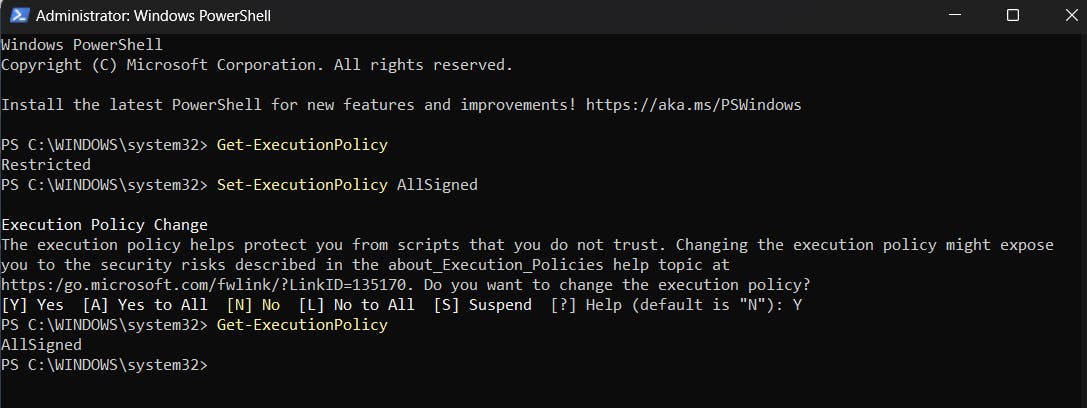
- Check for ExecutionPolicy using the below command
C:\WINDOWS\system32> Get-ExecutionPolicy
If it shows anything other than AllSigned, run the below command
C:\WINDOWS\system32> Set-ExecutionPolicy AllSigned
Step 3: Installing node.js and openJDK using chocolatey
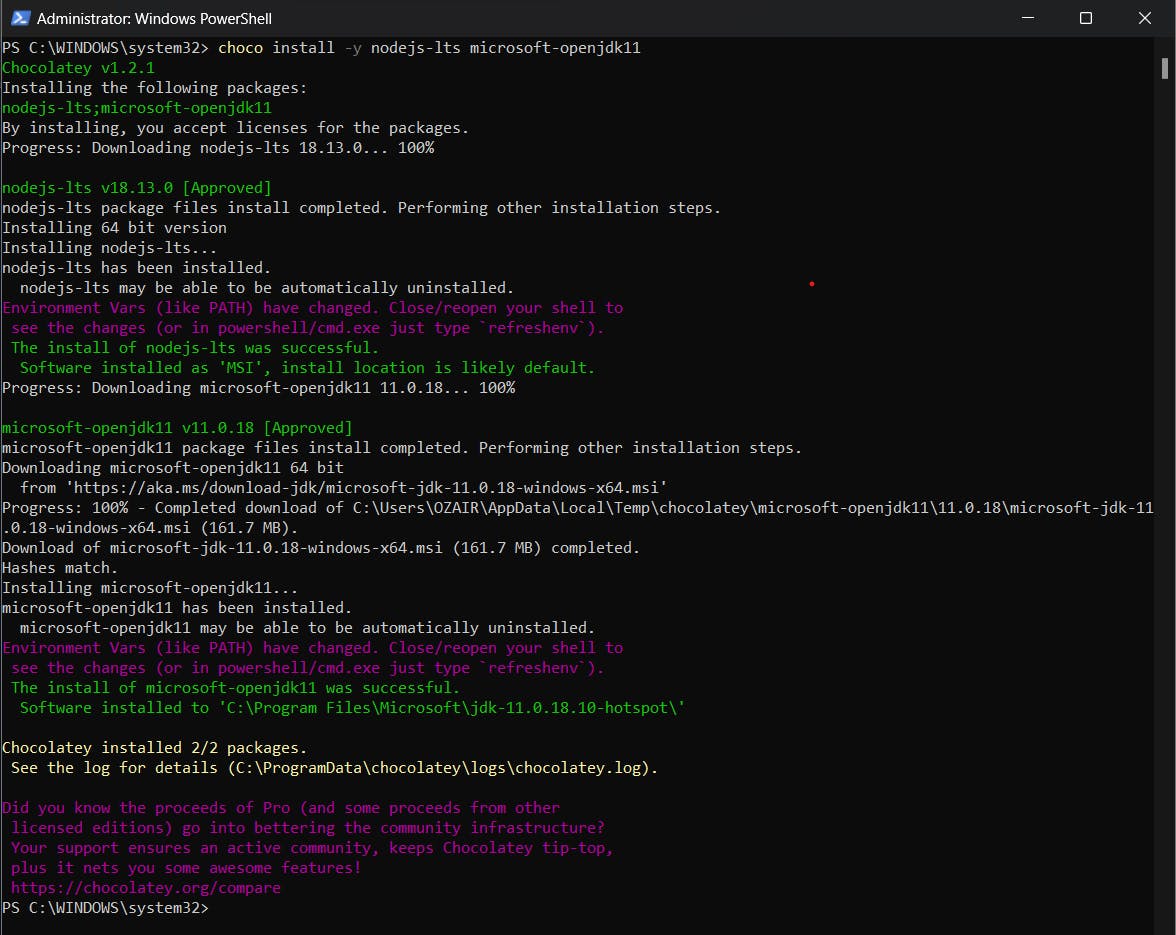
Open an Administrator Windows Powershell (right-click Windows Powershell and select "Run as Administrator"), then run the following command:
choco install -y nodejs-lts microsoft-openjdk11
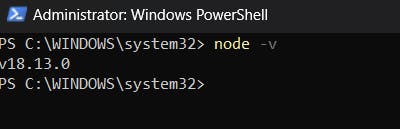
To check if node is installed run the below command
PS C:\WINDOWS\system32> node -v
To check if java is installed run the below command
PS C:\WINDOWS\system32> java --version

Step 4: Installation of Android Studio
Download the latest version of Android Studio from the official website (developer.android.com/studio)
Once the download is complete, open the installer file and follow the steps until you hit the below screen. Select custom and click 'Next'.

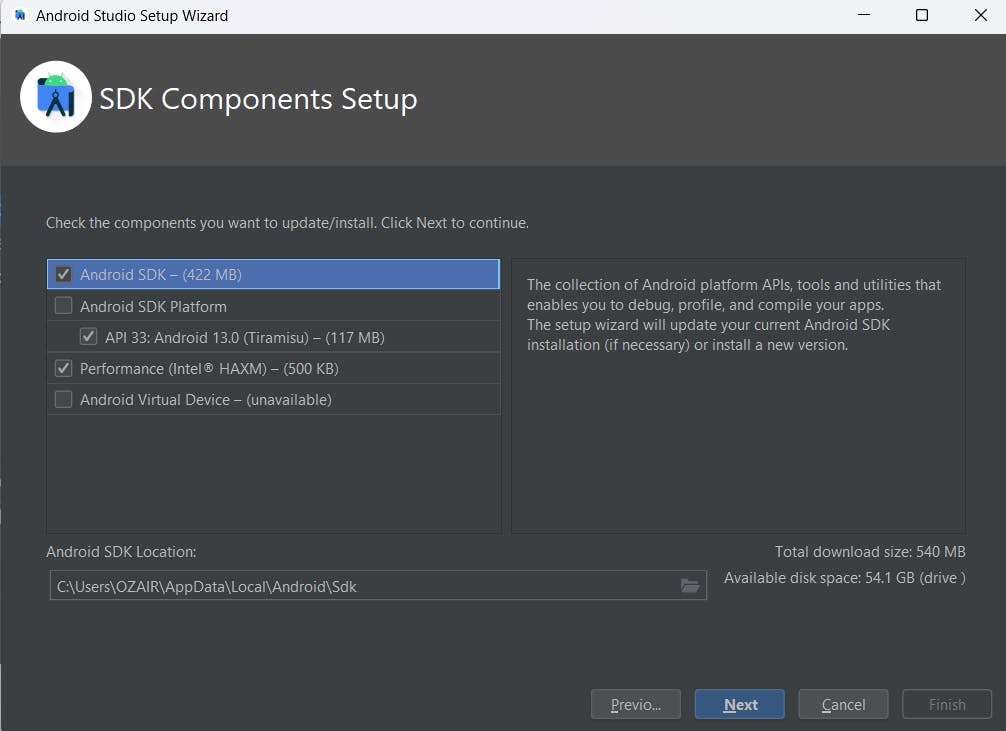
Continue by clicking on next until you see the below screen. Select
Android SDKAndroid SDK Platform
Then click Next.
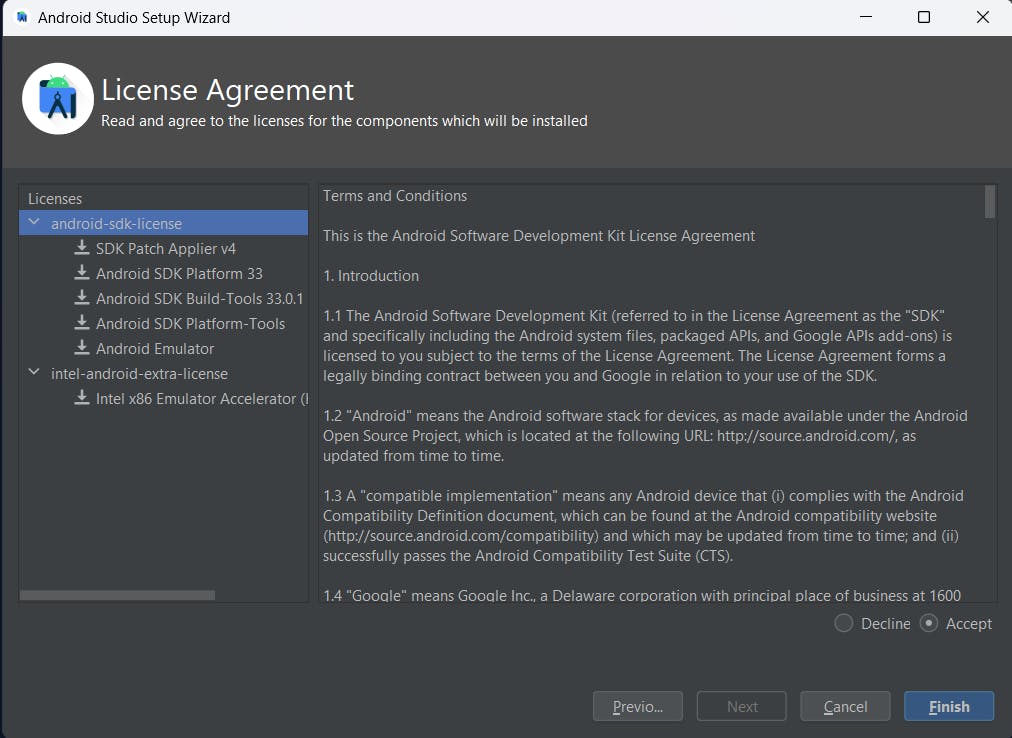
Accept the License Agreement and click finish.
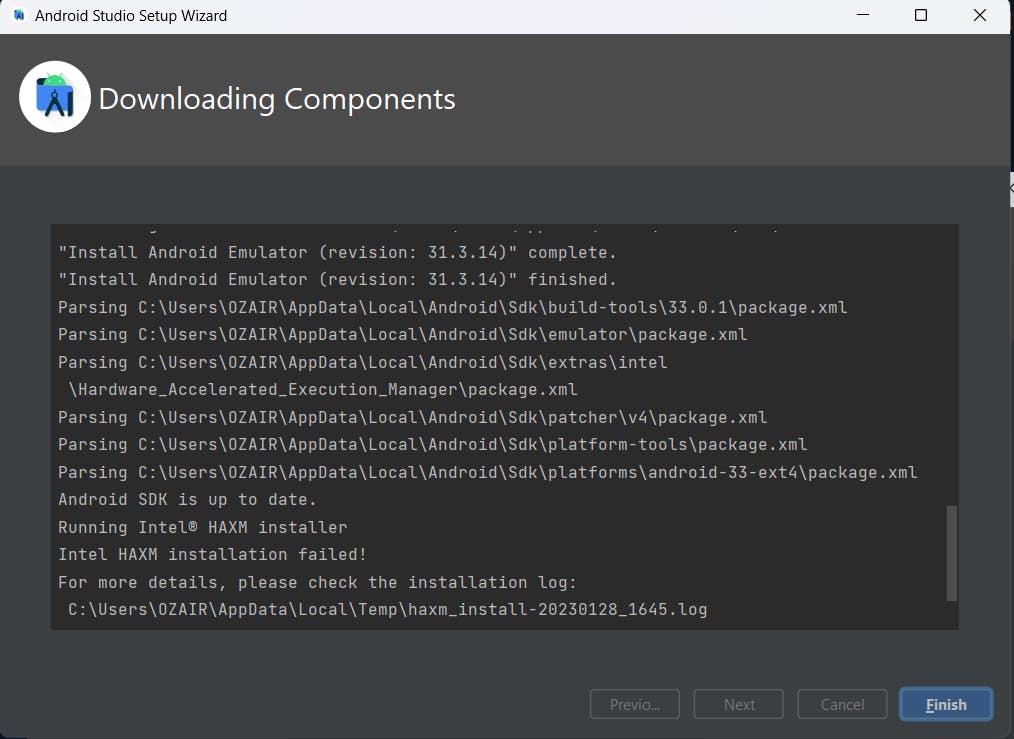
After downloading the required components, click finish.
You will see the below screen upon successful completion.
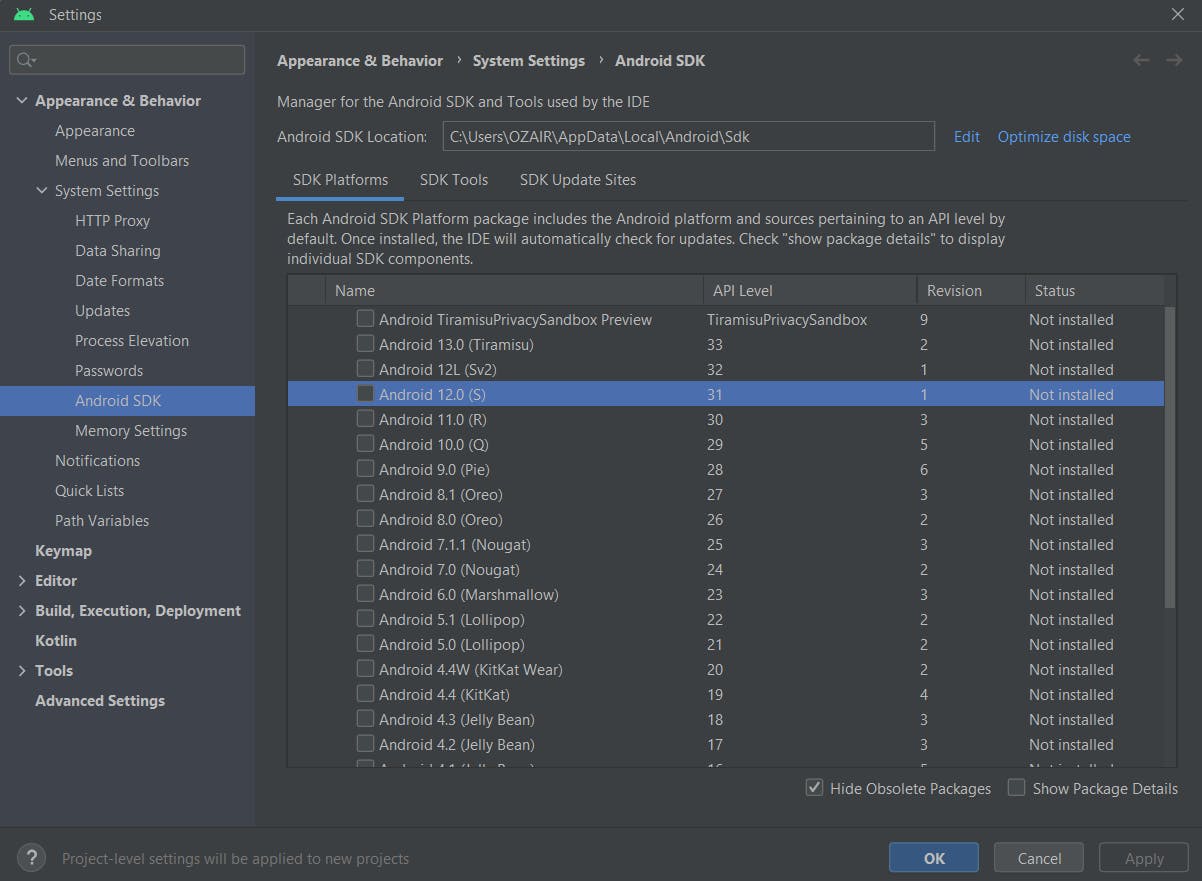
Building a React Native app with native code requires the Android 12 (S) SDK in particular. Goto More Actions dropdown and then click on SDK Manager. Install the relevant SDK.
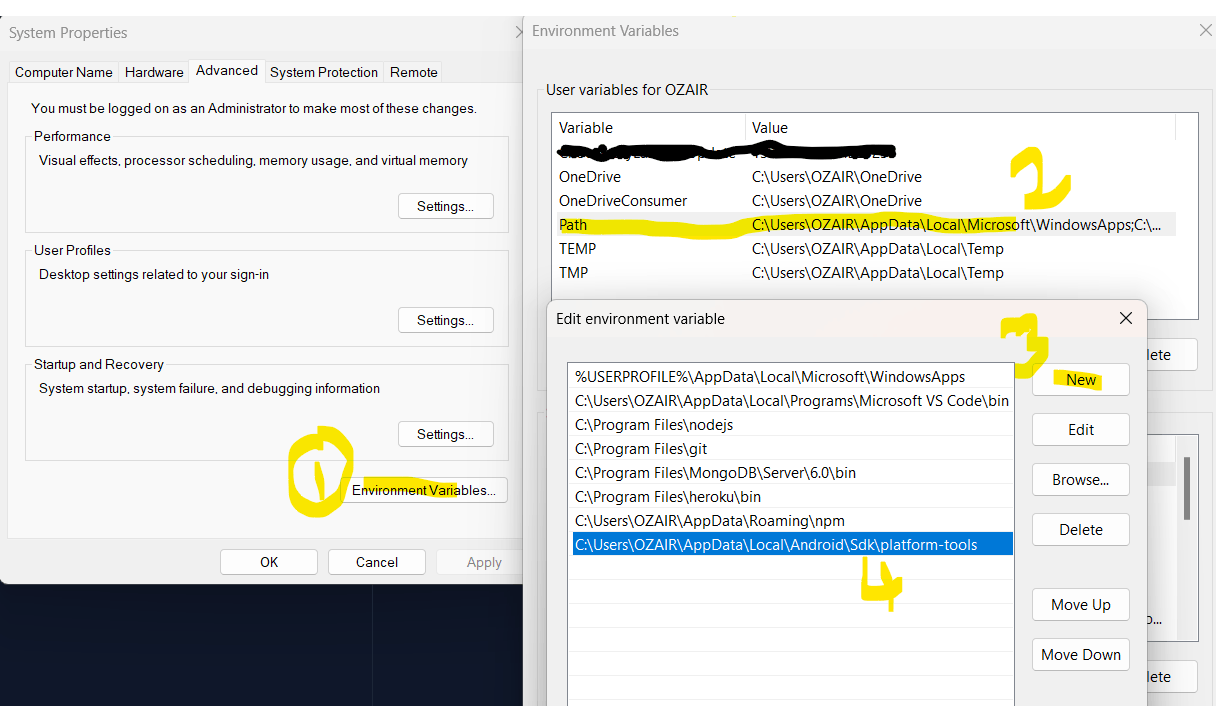
Set Environment Variable for adb.exe
Finally set the Environment path for adb.exe file (usually or in my case its C:\Users\your_user_name\AppData\Local\Android\Sdk\platform-tools). To set the path follow the below steps
Start > Control Panel > System > Advanced System Settings > Environment Variables..
In this Environment Variables window, in the User variables for (your-username) highlight
Pathand click Edit... or double**-**click onPathThen from Edit environment variable screen click on New and add the above adb.exe file path and click ok.
To check if adb is added to the path correctly run the below command
C:\Users\OZAIR>adb devices
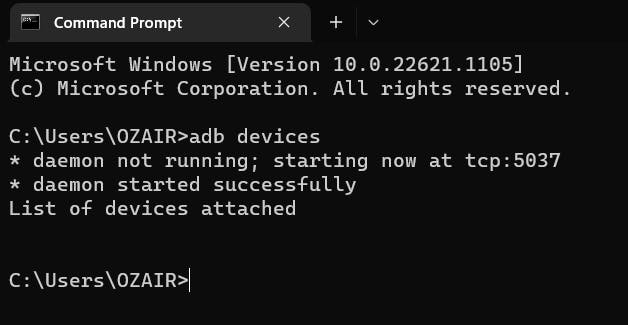
If you have followed everything correctly then you should be able to execute everything without any errors.
PS: You can set Environment variables as well for the Android Studio path.
Congratulations🥳🥳!! If you have made till here then you are ready to make your first React Native app. All the very Best...
Stay tuned for more such blogs.